Table of Contents
1. Introduction
Since 8.15 release you have new query language available in Elasticsearch called ES|QL. In this video I am going to show you how to join 2 indexes using that query language. Let’s start
2. Startup Elasticsearch and Kibana
It will be much more convenient to use DevTools execution panel instead running curl commands in shell therefore you will start Kibana togather with Elasticsearch. Here are commands:
					docker network create elkai

docker run --rm \
--name elk \
--net elkai \
-e ES_JAVA_OPTS="-Xms4g -Xmx4g" \
-e xpack.license.self_generated.type=trial \
-d \
-p 9200:9200 \
docker.elastic.co/elasticsearch/elasticsearch:8.15.2

docker exec -it elk bash -c "(mkfifo pipe1); ( (elasticsearch-reset-password -u elastic -i < pipe1) & ( echo $'y\n123456\n123456' > pipe1) );sleep 5;rm pipe1"

RESPONSE_JSON=`curl -k -XGET -u elastic:123456 "https://localhost:9200/_security/enroll/kibana"`
http_ca=$(echo "$RESPONSE_JSON" | jq -r '.http_ca')
kibanatoken=$(echo "$RESPONSE_JSON" | jq -r '.token.value')
echo "$http_ca" | sed 's/^/-----BEGIN CERTIFICATE-----\n/; s/$/\n-----END CERTIFICATE-----/' > http_ca.crt

docker run --rm \
--name kibana \
--net elkai \
-v ./http_ca.crt:/http_ca.crt \
-d \
-p 5601:5601 \
-e ELASTICSEARCH_SSL_VERIFICATIONMODE=certificate \
-e ELASTICSEARCH_HOSTS=https://elk:9200 \
-e ELASTICSEARCH_SERVICEACCOUNTTOKEN=$kibanatoken \
-e ELASTICSEARCH_SSL_CERTIFICATEAUTHORITIES=/http_ca.crt \
docker.elastic.co/kibana/kibana:8.15.2
please notice lines when you asked for service token for kibana and then you use it with environment variable ELASTICSEARCH_SERVICEACCOUNTTOKEN. That is convenient way to start quickly both services. I proposed 123456 password for you as usual (line 14)
3. Load test data
To better understand how it works you need to practice on some data. Therefore I prepared for you little sample. Please login to Kibana and execute below in dev tools console.
					PUT equipment
{
    "mappings": {
        "properties": {
            "item": {
                "type": "keyword"
            },
            "power_usage": {
                "type": "double"
            }
        }
    }
}

POST equipment/_bulk
{"index": {"_id": "1"}}
{"item": "Smartphone", "power_usage": 10.0}
{"index": {"_id": "2"}}
{"item": "laptop", "power_usage": 60.0}
{"index": {"_id": "3"}}
{"item": "Refrigerator", "power_usage": 250.0}
{"index": {"_id": "4"}}
{"item": "Incandescent Light Bulb", "power_usage": 10.0}


PUT inventory
{
    "mappings": {
        "properties": {
            "item": {
                "type": "keyword"
            },
            "room": {
                "type": "keyword"
            },
            "quantity": {
                "type": "integer"
            }
        }
    }
}

POST inventory/_bulk
{"index": {}}
{"item": "Refrigerator", "quantity": 1, "room": "lab"}
{"index": {}}
{"item": "laptop", "quantity": 3, "room": "reception"}
Confirm data was created
					POST /_query?format=txt
{
    "query": """
        from equipment
    """
}

POST /_query?format=txt
{
  "query": """
    from inventory
  """
}
4. Join indexes datasets
In Elasticsearch world it is named as enriched. You are going to create enrich policy which will define lookup table containing key value pair
4.1. Creating enrich policy
					PUT _enrich/policy/equipment-with-powerusage
{
    "match": {
        "indices": "equipment",
        "match_field": "item",
        "enrich_fields": [
            "power_usage"
        ]
    }
}
Check creation of new index
GET _cat/indices/.enrich*
You cannot see any new enrich index?
This is because after policy is created you have to execute it
4.2. Executing enrich policy
POST _enrich/policy/equipment-with-powerusage/_execute
Check again and now you see new index. You can check that it contain fields mentioned in the policy
					POST _query?format=csv
{
  "query":"""
  from .enrich-equipment-with-powerusage-*
  | limit 1000
  """
}
This is your lookup table. From now you can perform join using it.
4.3. Join two datasets to create summary
Run below command
					POST /_query?format=txt
{
    "query": """
        from inventory
        | keep item,quantity,room
        | enrich equipment-with-powerusage on item
        | eval total_watt_usage = quantity * power_usage
        | stats item_watts_usage = sum(total_watt_usage) by room,item
        | keep  item,item_watts_usage,room
    """
}
You should see nice report with sum of watt usage per room,item.
					     item      |item_watts_usage|     room
---------------+----------------+---------------
Refrigerator   |250.0           |lab
laptop         |180.0           |reception
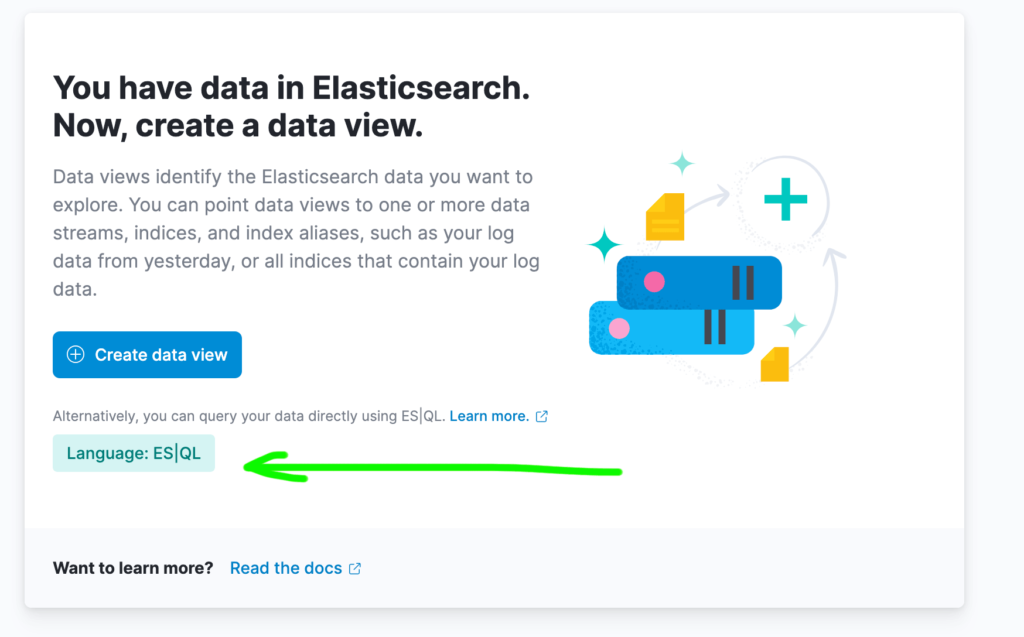
5. Accessing ES|QL from Discovery
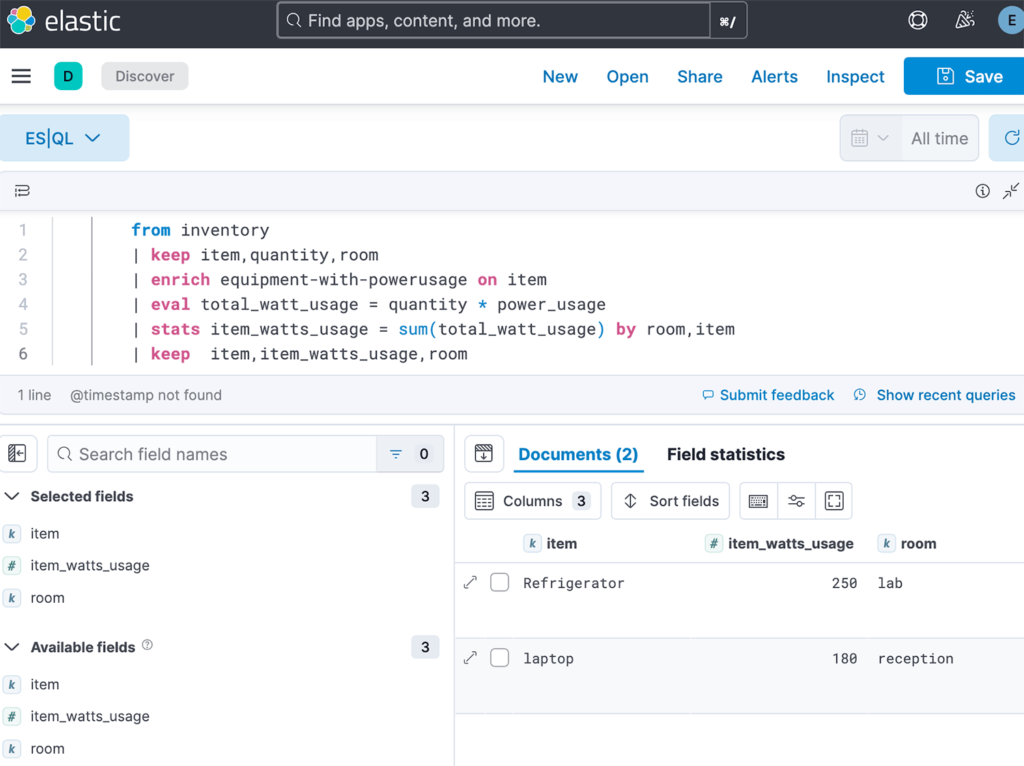
You can execute same query within Discovery section in Kibana.
Results are same
6. Summary
In this tutorial you have learned how to use ES|QL language in Kibana to join 2 datasets and create summary report. Now you can explore idea for your project.