Table of Contents
1. Introduction
I didn’t like Kibana index patterns since Elasticsearch 2.0 times. Whatever indexes you wanted to be searchable in Kibana have to be added as index pattern. Index pattern name was equal to that list. That strange, no custom name that can be short and nice. If you have index pattern like wildcard ‘*’ which will call all indices then it is not that bad but what if the list contain 100s of indexes and due to their unique names is easier to just write them explicitly rather than think about regex that will cover all of them. Bad 🙁
Time has change. Now there is API called Data Views which allow to name your index pattern in nice way. In this tutorial I will show you in few simple steps how to create index pattern using old API call for reference purpose, then I will show you benefits of new API. Let’s start.
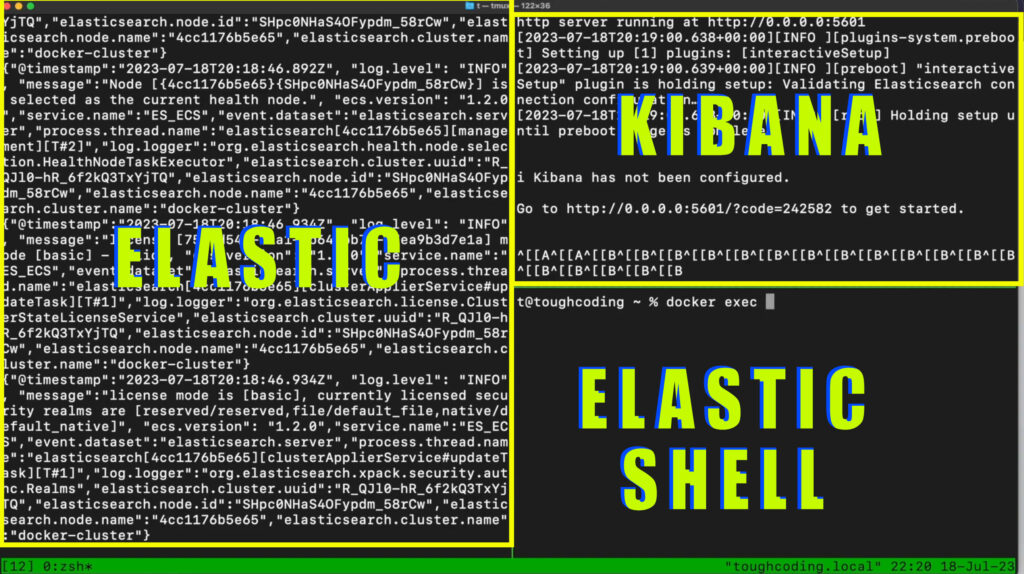
2. Start Elasticsearch and Kibana
To start Elasticsearch and Kibana execute below commands
					docker network create kibana

docker run --rm \
--name elk \
--net kibana \
-p 9301:9300 \
-p 9201:9200 \
docker.elastic.co/elasticsearch/elasticsearch:8.8.1

docker run --rm \
--name kibana \
--net kibana \
-p 5601:5601 \
docker.elastic.co/kibana/kibana:8.8.1
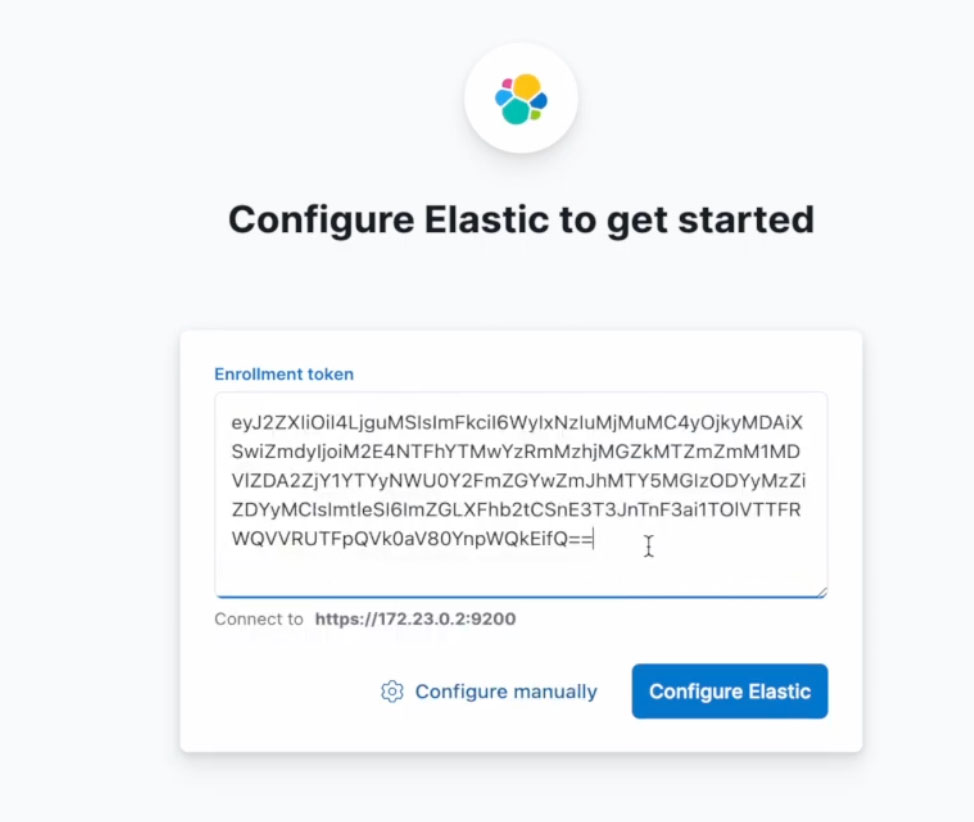
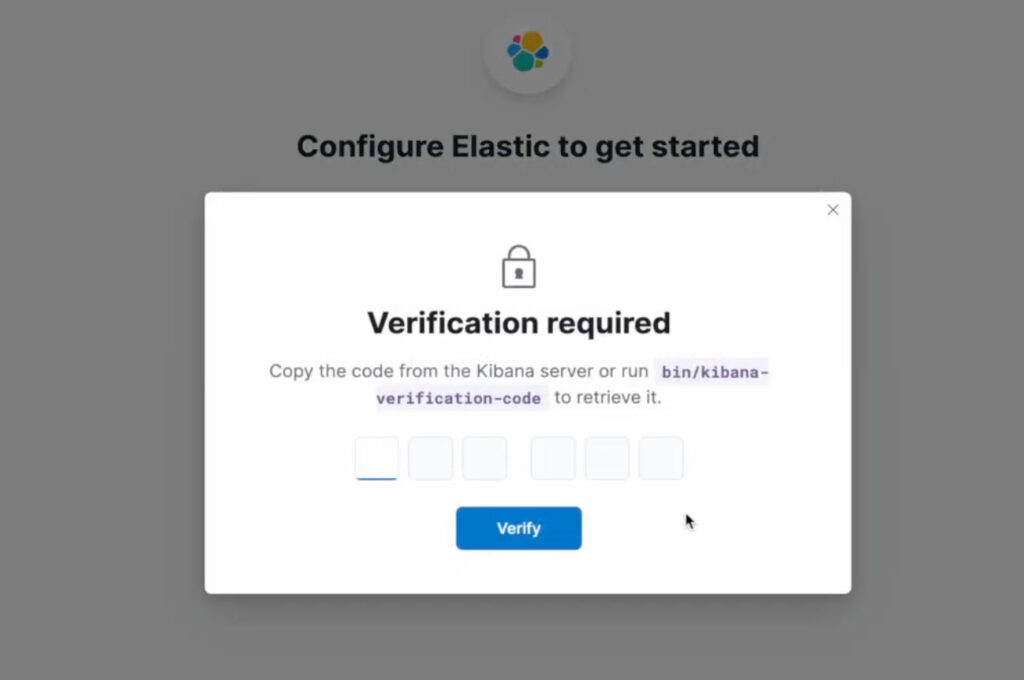
Once elasticsearch is up and running it’s time for you to connect each other. This will happen in 4 additional steps:
- Setup password for Elasticsearch user called elastic
- Generate enrollment token for Kibana
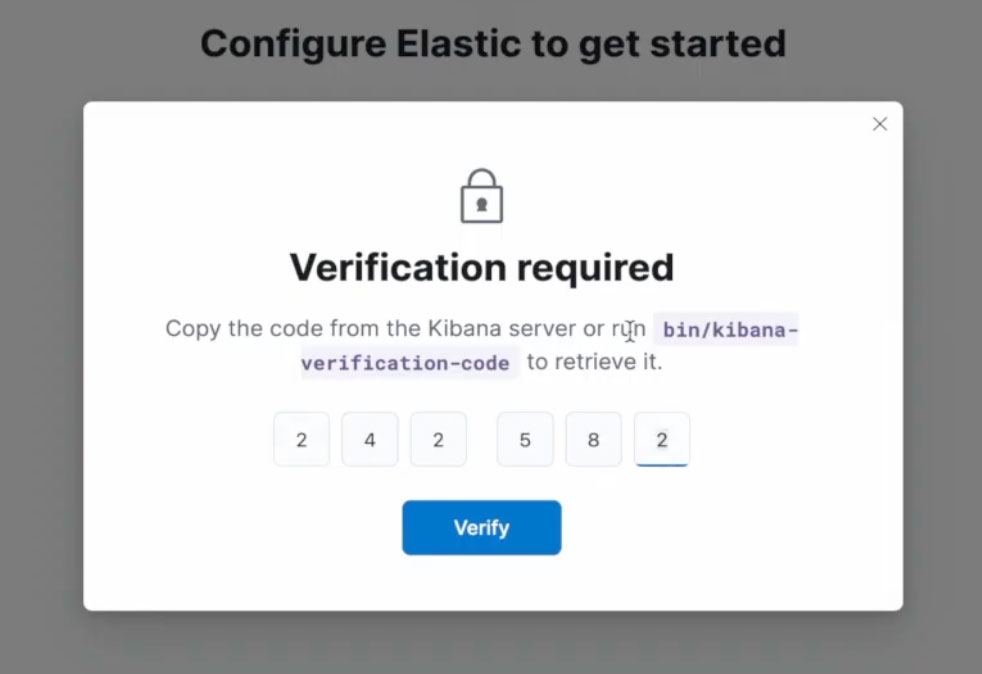
- Open link http://localhost:5601 and paste token there
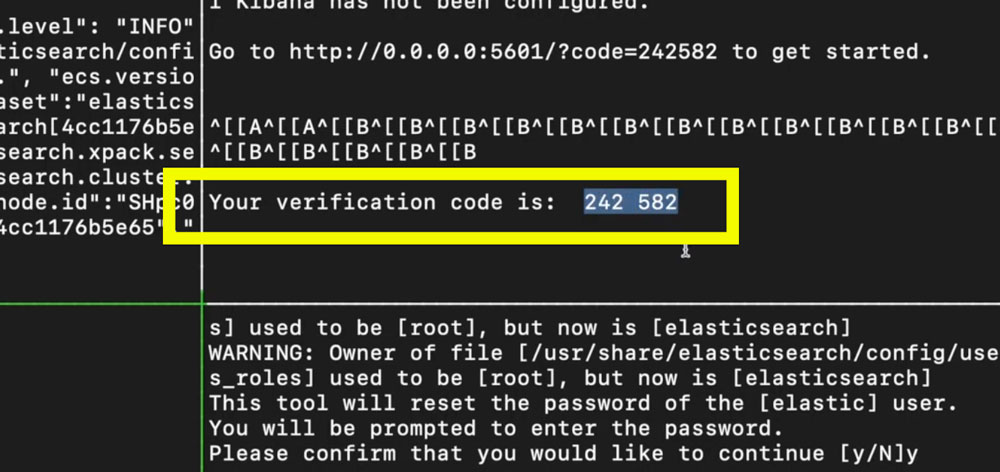
- Copy displayed verification code into Kibana and that’s it.
Let’s do it
					# setup new password for elastic user and remember it
docker exec -it elk /usr/share/elasticsearch/bin/elasticsearch-reset-password -i --batch -u elastic

# apply for new enrollment token
docker exec -it elk /usr/share/elasticsearch/bin/elasticsearch-create-enrollment-token -s kibana
I recommend to start tmux and create 2 panes for Elasticsearch and Kibana separately for convenience.
- To split window into 2 panes upper and lower you use Ctrl+B and then type “
- For left and right Ctrl+B and then %
- To switch between panes Ctrl+B and then arrows
That is useful for running multiple shell apps.
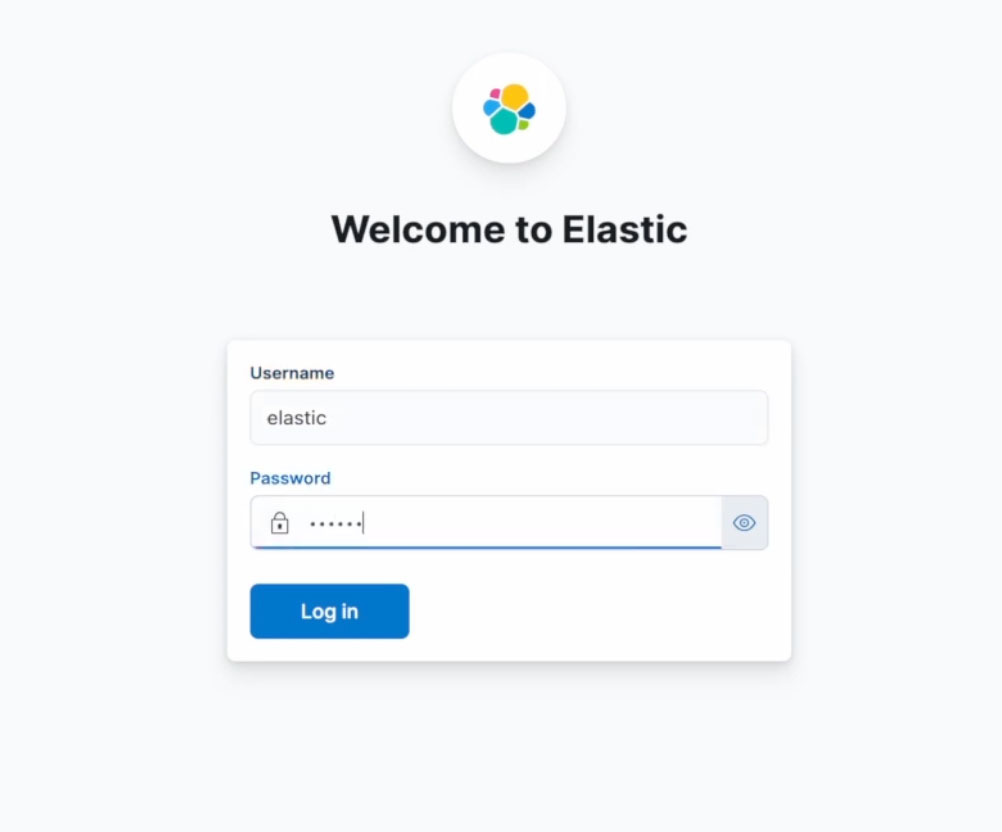
You login to Kibana using
- elastic as username
- password you setup with elasticsearch-reset-password
3. Load sample data
To have something to display I will give you commands here to load sample data. Exactly 4 different indexes and each contain 2 documents, in total 8 documents.
					curl -k -u elastic -XPOST "https://localhost:9201/producta/_bulk" -H 'content-type: application/json' -d'
{"index":{"_id":"broomstick"}}
{"description":"wooden"}
{"index":{"_id":"dustbin"}}
{"description":"metal"}
'
curl -k -u elastic -XPOST "https://localhost:9201/productb/_bulk" -H 'content-type: application/json' -d'
{"index":{"_id":"keyboard"}}
{"description":"black"}
{"index":{"_id":"mouse"}}
{"description":"grey"}
'
curl -k -u elastic -XPOST "https://localhost:9201/customera/_bulk" -H 'content-type: application/json' -d'
{"index":{"_id":"corpo"}}
{"location":"madrit"}
{"index":{"_id":"shoppingmall"}}
{"location":"london"}
'
curl -k -u elastic -XPOST "https://localhost:9201/customerb/_bulk" -H 'content-type: application/json' -d'
{"index":{"_id":"corpo"}}
{"location":"oslo"}
{"index":{"_id":"shoppingmall"}}
{"location":"los angeles"}
'
4. Create old school index patterns
For reference I will show you how index pattern were created before and how they were looking like. Notice that below command calling http instead of secure https. This is because Kibana at this moment does not setup TLS automatically. It is not difficult to make it https but to keep this article straight to the point I am skipping that part.
					curl -k -u elastic -XPOST "http://localhost:5601/api/index_patterns/index_pattern" -H 'content-type: application/json' -H 'kbn-xsrf: reporting' -d'
{
    "index_pattern": {
        "id": "ALL_INDICES",
        "title": "ALL_INDICES,producta,productb,customera,customerb"
    }

}'

curl -k -u elastic -XPOST "http://localhost:5601/api/index_patterns/index_pattern" -H 'content-type: application/json' -H 'kbn-xsrf: reporting' -d'
{
    "index_pattern": {
        "id": "CUSTOMERS",
        "title": "CUSTOMERS,customera,customerb"
    }

}'

curl -k -u elastic -XPOST "http://localhost:5601/api/index_patterns/index_pattern" -H 'content-type: application/json' -H 'kbn-xsrf: reporting' -d'
{
    "index_pattern": {
        "id": "PRODUCTS",
        "title": "PRODUCTS,producta,productb"
    }

}'
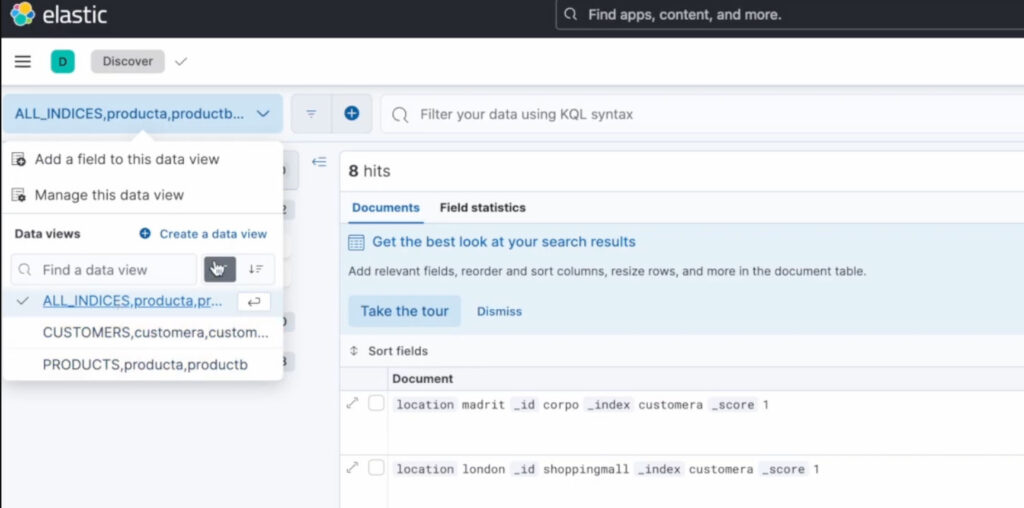
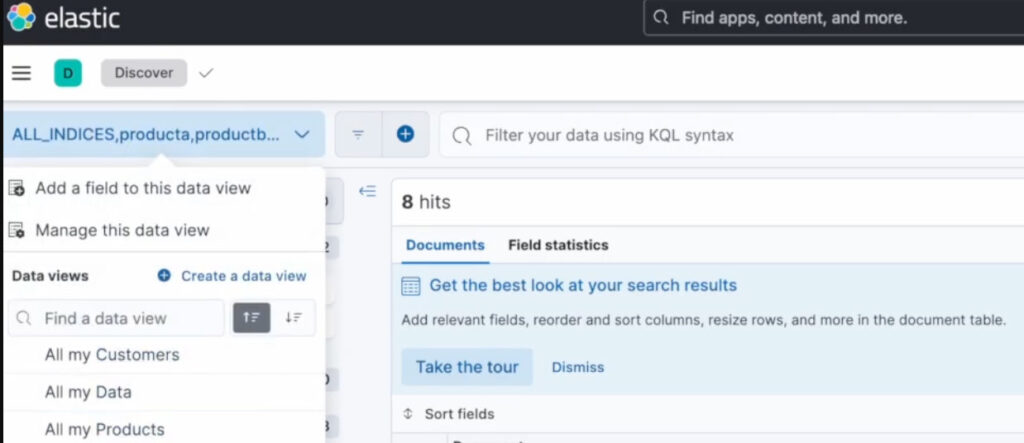
Once you finished executing commands you can login to Kibana and see that index patterns get created. Notice that I am using explicitly id for index pattern name in API call – this is useful if I want to delete them later on using API. I am starting title with all capital letters because it will help me understand what index pattern is representing and because you cannot create index in Elasticsearch using uppercase letters then this will not match anything by accident.
5. Create data views
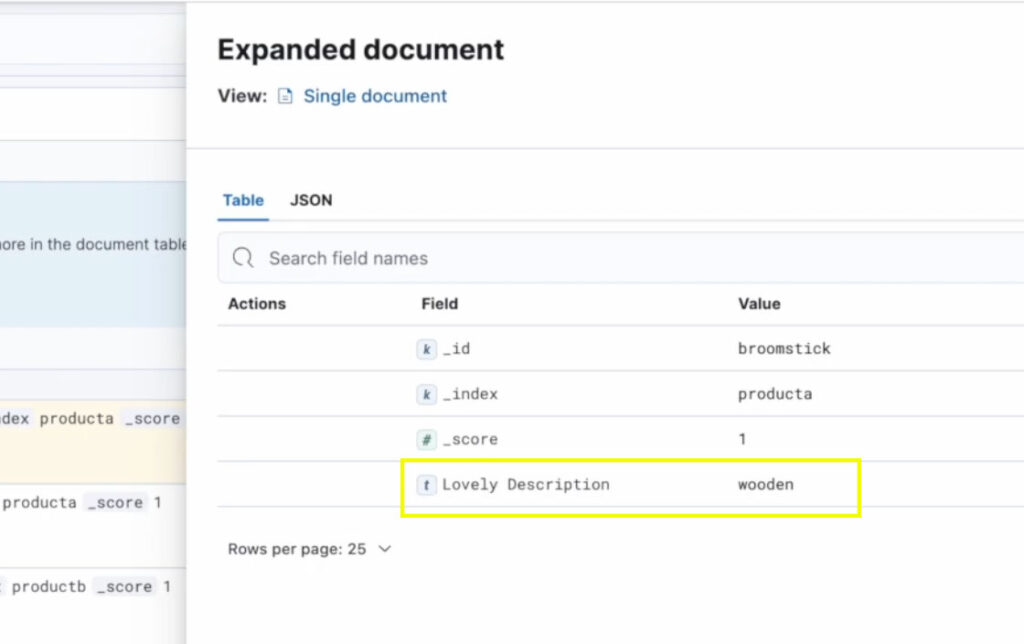
Now beauty of Elasticsearch 8 release. Notice there is new field called ‘name’ which allow me to prepare nicely formatted name. Additionally ‘fieldAttrs’ with ‘customLabel’ helped me changing documents content on the fly. In this way
- ‘location’ switched into ‘Customer Location’
- ‘description’ switched into ‘Lovely Description’
					curl -k -u elastic -XPOST "https://localhost:5601/api/data_views/data_view" -H 'content-type: application/json' -H 'kbn-xsrf: reporting' -d'
{
  "data_view": {
     "title": "producta,productb",
     "name": "All my Products",
     "fieldAttrs": {
      "description": {
        "customLabel": "Lovely Description"
      }
    }
  }
}'


curl -k -u elastic -XPOST "https://localhost:5601/api/data_views/data_view" -H 'content-type: application/json' -H 'kbn-xsrf: reporting' -d'
{
  "data_view": {
     "title": "customera,customerb",
     "name": "All my Customers",
     "fieldAttrs": {
      "location": {
        "customLabel": "Customer Location"
      }
    }

  }
}'

curl -k -u elastic -XPOST "https://localhost:5601/api/data_views/data_view" -H 'content-type: application/json' -H 'kbn-xsrf: reporting' -d'
{
  "data_view": {
     "title": "producta,productb,customera,customerb",
     "name": "All my Data",
     "fieldAttrs": {
      "description": {
        "customLabel": "Lovely Description"
      },
      "location": {
        "customLabel": "Customer Location"
      }
    }

  }
}'
Looking much better now.
6. Comparison
Data Views are more neat. Actually only ‘name’ field is new parameter but for me it is enough to switch from old deprecated API into new. Because this is what bothering me and now it’s fixed. See below 2 API requests giving almost same results but differentiate by this magic ‘name’.
					# OLD API Request
curl -k -u elastic -XPOST "http://localhost:5601/api/index_patterns/index_pattern" -H 'content-type: application/json' -H 'kbn-xsrf: reporting' -d'
{
    "index_pattern": {
        "id": "PRODUCTS",
        "title": "PRODUCTS,producta,productb",
        "fields": {
            "description": {
                "name":"description",
                "customLabel": "Lovely Description"
            }
        }
    }
}'
					# The NEW API Request
curl -k -u elastic -XPOST "https://localhost:5601/api/data_views/data_view" -H 'content-type: application/json' -H 'kbn-xsrf: reporting' -d'
{
  "data_view": {
     "title": "producta,productb",
     "name": "All my Products",
     "fieldAttrs": {
      "description": {
        "customLabel": "Lovely Description"
      }
    }
  }
}'
Clean up
To stop containers in the shell I am typing Ctrl+C , that killing them gracefully. To close tmux pane type exit. Finally to remove created docker network type:
docker network remove kibana;
That was good, wasn’t it?
Follow my YouTube channel for more such videos as I am going to post more and more. I will publish tutorials here on the blog so it is easy for you to copy and paste and run. Much better than rewriting from the video.
See you next time!